Saturday, October 15, 2011

command line to use acldiag.exe/How to take a report on Active Directory (AD) delegation permissions per OU/Site/Group/object.


   Microsoft provides a free command line utility called acldiag.exe to by which we can generate a report like log based on the permissions and delegation assigned to Ou's/groups/objects in active directory.


  we ca even give input from a text file if you need to take report on multiple Ou's. The text file must contains Ou names.

   let's see that ...

here we will see an example code to take permission report for multiple Ou's in a domain. the names of the OU's will be given to batch file through a text file.

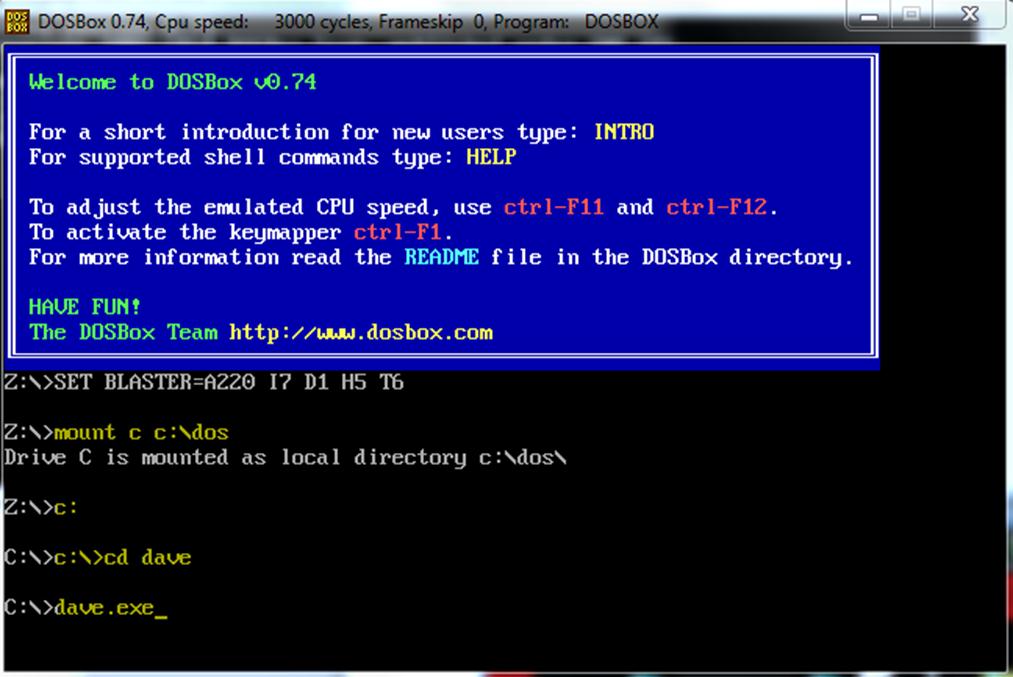
Download support tools from http://www.microsoft.com/download and install it in your computer.

for /f %%a in (c:\users\delphin\desktop\list.txt) do (
acldiag "ou=%%a,dc=domain,dc=com" >>c:\users\delphin\desktop\log.txt
)


Copy the above code and paste it into a notepad file, replace "domain" with your domain name, replace "c:\users\delphin\desktop\list.txt" with the text file containing the list of OUs in your domain.

Replace "c:\users\delphin\desktop\log.txt" with the location where you want the log file to be saved. And rename it to adreport.bat.

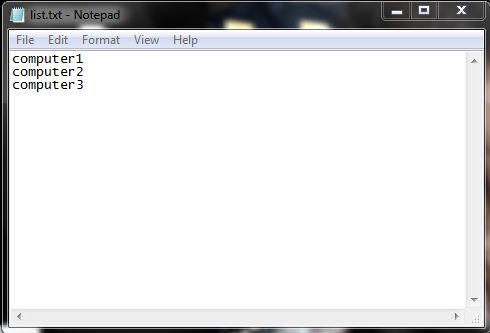
The file list.txt must contain the list of the name of the OU's, as one OU name in a line.


The log.txt will contain the details as in the following screenshot.


Hope this helps..
                                                                                                                                           Techytips

Friday, October 14, 2011

Run psexec.exe for list of computers stored in text file | batch file to ping a list of computers in a text file | Give input to command prompt from a text file


  Psiexec.exe is a nice, handy command line utility given by Microsoft through which we can run batch commands remotely to remote computer.

  Consider a situation when you need to run a specific or a set commands to multiple no of computers remotely from your computer across your LAN.

  This script described in this post will fetch computer names from a text file and run commands remotely with psiexec.exe command line utility...

 Let's say that you need to renew ip address in many computers across your LAN,

First thing you need to do is to download ps tools from http://technet.microsoft.com , extract the zip file and past all the files to c:\windows\syste32\ folder.

Then copy the below command lines and paste to a text file. rename it to ipenew.cmd

for /f %%a in (c:\users\delphin\desktop\list.txt) do (
psexec \\%%a ipconfig /renew
)

replace "delphin" with your login profile, make a text file with list of computer names or ip address (one computer name in a line)


That's it. Double click the iprenew.cmd file to run it from your computer. That will take the computers names from the text file and will run the ipconfig /renew command in each of those computers.


Hope this helps..
                                                                                                                                   Techytips

Thursday, October 13, 2011

C++ example program to write contents to a text file.


  Below is the simple c++ example program, to read contents from a text file stored in your computer's hard drive...


#include<iostream.h>
#include<fstream.h>
void main()
{
 char *name;
 int num;
 ofstream fileout;
 fileout.open("d:\\cpp\\pgm\\a.txt");
 cout<<"Enter the name"<<endl;
 cin>>name;
 cout<<"Enter number"<<endl;
 cin>>num;
 fileout<<name<<endl;
 fileout<<num<<endl;
 fileout.close();
}


Hope this helps..

                                                                                                                                        Techytips

C++ example program to read contents from a text file.


  Below is the simple c++ example program, to read contents from a text file stored in your computer's hard drive...


#include<iostream.h>
#include<fstream.h>
void main()
{
 char *name;
 int num;
 ifstream filein;
 filein.open("d:\\cpp\\pgm\\a.txt");
 filein>>name;
 filein>>num;
 cout<<name<<endl;
 cout<<num<<endl;
 filein.close();
}


Hope this helps..

                                                                                                                                          Techytips

Wednesday, October 12, 2011

backup all your photos and videos and status updates and comments uploaded in facebook.


  Are you those guys who spends most of the time on Facebook and upload loads of your photos and videos to it??

  Then you must read this article. Facebook offers us to backup the items we uploaded to Facebook. There simple steps to do that.


 Let see those steps...


Step 1

           login to your Facebook account, Click on the down arrow next to HOME button and select account settings


In account settings click on download a copy of your Facebook data.


In the next window click on Start my archive..


Then Facebook will start to archive your data. you need to wait for some time, once the archiving completed Facebook will send you an email with download link for your archive.


 Step 2

            Once you receive the email from Facebook click on the link to download your archive. it will ask you retype your Facebook password.. Type the password and the download will be started.


After the download completed, open the index.html inside the archive and check all the informations downloaded completely.

Hope this helps..

                                                                                                                                        Techytips

Monday, October 10, 2011

C++ example program to sort a string.

This program can be used to sort a string...


/* String sorting */

#include<iostream.h>
#include<string.h>
#include<process.h>
#include<conio.h>
#define NULL 0
class string
{
 private:
  char str[100][100];
 public:
  void getstring(int);
  void display(int);
  void sortstr(int);
};
void string::getstring(int n)
{
 char temp[100];
 for(int i=0;i<n;i++)
 {
  cout<<"Enter the String"<<endl;
  cin>>temp;
  strcpy(str[i],temp);
 }

}

void string::display(int n)
{
 for(int i=0;i<n;i++)
 {
  cout<<endl<<"String "<<i+1 << ":" << str[i];
 }

}
void string::sortstr(int n)
{
 char temp[100];
 for(int i=0;i<n;i++)
 {
  for(int j=i+1;j<n;j++)
  {
   if(strcmp(str[i],str[j]) > 0 )
   {
    strcpy(temp,str[i]);
    strcpy(str[i],str[j]);
    strcpy(str[j],temp);
   }
  }
 }
}
void main()
{
 string strobj;
 clrscr();
 int nstr;
 cout<<"How many String to work"<<endl;
 cin>>nstr;
 strobj.getstring(nstr);
 strobj.sortstr(nstr);
 strobj.display(nstr);

}

Hope this helps..

                                                                                                                                         Techytips

C++ example program to perform string related operations like string copy, string compare, string merge, upper and lower..


  In this example, various string operations like string copy, string compare, string merge, string uppercase, string lower case.
 
  Each operation is explained using separate function.

  Copy and paste the below code in a text file, and rename it as filename.cpp...

#include<iostream.h>
#include<ctype.h>
#include<string.h>
#include<conio.h>
class strhandle
{
 private:
  char str[100];
 public:
  strhandle();
  void get_str();
  void strcopy();
  void strmerge(char[]);
  void strcompare(char[],char[]);
  void struppercase();
  void strlowercase();
};
strhandle::strhandle()
{
 str[0]='\0';
}
void strhandle::get_str()
{
 cout<<"Enter the String to copy"<<endl;
 cin>>str;
}
void strhandle::strcopy()
{
 char *s1;
 strcpy(s1,str);
 cout<<"Copied string="<<s1<<endl;
}
void strhandle::strmerge(char *s2)
{
 cout<<"After merge:"<<strcat(str,s2)<<endl;
}
void strhandle::strcompare(char *s3, char *s4)
{
 int i;
 i=strcmp(s3,s4);
 if(i > 0)
 {
  cout<<"String "<<s3 << "is bigger than" << s4<<endl;
 }
 else if(i < 0)
 {
  cout<<"String "<<s3 << "is smaller than" << s4<<endl;
 }
 else
 {
  cout<<"Both string are equal"<<endl;
 }
}
void strhandle::struppercase()
{
 cout<<"Uppercase"<<endl;
 for(int i=0;i<strlen(str) ;i++)
 {
  cout<<(char)toupper(str[i]);
 }
 str[0]='\0';
 cout<<endl;
}
void main()
{
 clrscr();
 strhandle strobj;
 strobj.get_str();
 strobj.strcopy();
 char *str1;
 char *str2;
 char *str3;
 str1[0]='\0';
 str2[0]='\0';
 str3[0]='\0';
 cout<<"Enter the string to merge"<<endl;
 cin>>str2;
 strobj.strmerge(str2);
 str2[0]='\0';
 cout<<"Enter the first string to compare"<<endl;
 cin>>str2;
 cout<<"Enter the second string to compare"<<endl;
 cin>>str3;
 strobj.strcompare(str2,str3);
 str2[0]='\0';
 str3[0]='\0';
 strobj.struppercase();
 getch();
}

Hope this helps..
                                                                                                                                                                                  
                                                                                                                                    Techytips             

C++ example program to sort the the array of elements.


  In this example, the algorithm to sort an array of elements is explained.

  This program will compare the adjacent elements in a array and swap based on the result.

  Copy and paste the below code in a text file, and rename it as filename.cpp ...

/* program to Sort the Array*/
#include<iostream.h>
#include<conio.h>
class sort
{
 private:
  int arr[100];
  int val;
 public:
  void sortarr();
};
void sort::sortarr()
{
 printf("How many values"<<endl;
 cin>>val;
 printf("Enter the Values"<<endl;
 for(int i=0;i<val;i++)
 {
  cin>>arr[i];
 }
 for(int i=0;i<val;i++)
 {
  for(int j=i+1;j<val;j++)
  {
   if(arr[i] > arr[j])
   {
    int temp=arr[i];
    arr[i]=arr[j];
    arr[j]=temp;
   }
  }
 }
 printf("Sorted Elements"<<endl;
 for(int i=0;i<val;i++)
 {
  cout<<arr[i]<<endl;
 }
}
void main()
{
 sort sortobj;
 clrscr();
 sortobj.sortarr();
 getch();
}

Hope this helps...

                                                                                                                                          Techytips

C++ example program to understand constructor and inheritance of objects.


  This post contains the c++ example code to understand constructors and inheritance...


#include<iostream.h>
#include<conio.h>
class B
{
};
class D:public B
{
 public:
  void msg()
  {
   cout<<"No constructors in base class and derived class"<<endl;
  }

};
void main()
{
 D objd;
 clrscr();
 objd.msg();
 getch();
}

Hope this helps.

                                                                                                                                     Techytips

C++ example program to perform arithmetic operations like addition, subtraction, multiplication and division.


   This post contains the c++ example code for performing arithmetic operations.

   In this example, each arithmetic function is explained using separate functions.

   Copy and paste the below code in a text file, and rename it are filename.cpp ...

/* program to perform arithmetic operations*/
#include<iostream.h>
#include<process.h>
#include<conio.h>
class Arith
{
    private:
        int x,y;
    public:
        int add();
        int sub();
        int mul();
        int div();
};
int Arith::add()
{
    cout<<"Enter the x value"<<endl;
    cin>>x;
    cout<<"Enter the y value"<<endl;
    cin>>y;
    return(x+y);
}
int Arith::sub()
{
    cout<<"Enter the x value"<<endl;
    cin>>x;
    cout<<"Enter the y value"<<endl;
    cin>>y;
    return(x-y);
}
int Arith::mul()
{
    cout<<"Enter the x value"<<endl;
    cin>>x;
    cout<<"Enter the y value"<<endl;
    cin>>y;
    return(x*y);
}
int Arith::div()
{
    cout<<"Enter the x value"<<endl;
    cin>>x;
    cout<<"Enter the y value"<<endl;
    cin>>y;
    return(x/y);
}
main()
{
    Arith obj;
    char ch;
    clrscr();
    while(1)
    {
    cout<<"a:Addition"<<endl;
    cout<<"s:Subtraction"<<endl;
    cout<<"m:Multiply"<<endl;
    cout<<"d:Division"<<endl;
    cout<<"e:exit"<<endl;
    cout<<"Enter your Choice"<<endl;
    cin>>ch;
    switch(ch)
    {
        case 'a':
                int a=obj.add();
                cout<<"Addtion Result="<<a<<endl;
                break;
        case 's':
                int s=obj.sub();
                cout<<"Subtract Result="<<s<<endl;
                break;
        case 'm':
                int m=obj.mul();
                cout<<"Multiply Result="<<m<<endl;
                break;
        case 'd':
                int d=obj.div();
                cout<<"Division Result="<<d<<endl;
                break;
        case 'e':
                exit(0);
    }
    }
    getch();
} 

Hope this helps..
                                                                                                                                                               
                                                                                                                                     Techytips

Wednesday, September 28, 2011

Microsoft Visual C++ 2005 Redistributable (x86)/(x64) Failed - Installation aborted, Result=1619 While installing autodesk 2012 products


Some of my friends are started using Autodesk 2012 products and almost everybody came across the error stated as in the title. In Autodesk forums everybody suggested a clean install.

  But that will me most painful thing when they have other prior versions on Autodesk products.

  After a bit of research i was able to help them out without uninstalling previous versions of Autodesk products. sharing the solution  may help my blog readers...


For all of my friends the Autodesk 2012 products failed because the setup failed to install Microsoft Visual C++ 2005 Redistributable (x86)/(x64).  So i checked in installed programs to find the instances of Microsoft Visual C++ 2005 Redistributable (x86)/(x64) .

   surprisingly there were more that 6-7 instances of the Microsoft Visual C++ 2005/2008 Redistributable (x86)/(x64) . So i decided to uninstall all of them through control panel.

  Once i removed all the instances of Microsoft Visual C++ 2005/2008 Redistributable (x86)/(x64) ,I re-registered msiexec.exe through the below command line options in command prompt.

msiexec.exe -unreg
msiexec.exe -regserver

Restarted the computer and started the installation again, Voila!! Installation finished without any error or warning message. Hope this helps..

                                                                                                                                            Techytipz

Monday, September 19, 2011

Download Microsoft Windows 8 Developer Preview Build 8102 M3 32/64 bit


  Microsoft Windows 8 developer preview build 8102 32/64 bit is available for download from official Microsoft website.

  Windows 8 is not only the next version of Microsoft's familiar desktop interface, but is also the company's answer to the challenge of tablets too. That’s a difficult pair of challenges to straddle and not everything about the new interface is a success. This is also definitely pre-beta software that needs more development work, but we expected that...


  The good news for businesses is that Windows 8 is still a fully-capable desktop operating system with full compatibility and even more security, visualization and remote access options, but with the touchscreen support so many users want. Most users shouldn’t need a new PC to run it, though they may well want a new one for touch. For some workers, iPads and Android tablets can’t replace a PC; with Windows 8 Microsoft could deliver an option that gives business users the best of both worlds. Read more from the original article

  The Microsoft Windows 8 Developer Preview Build 8102 M3 32/64 bit can be downloaded from the below links available.

Download 32 bit version of Microsoft Windows 8 Developer Preview Build 8102 in iso format


 Download 64 bit version of Microsoft Windows 8 Developer Preview Build 8102 in iso format
                                                                                                                                                            
 Hope you will enjoy this post. windows 8 review will be available soon..


                                                                                                                                        Techytipz

Sunday, September 11, 2011

symantec endpoint protection 11 (sep11) detects DWH***.tmp as a generic trojan in temp folder


  In some computers the Symantec endpoint protection auto protect will keep on detecting dwh***.tmp files as a generic.trojan in temp folder.

  Even if you delete all the files in Quarantine folder, this message will keep on coming. I finally figured it out, to wipe this message off.

  In this post we will discus about that solution...


SOLUTION


   1) Turn off system restore
   2) Delete the quarantined files and temp files
   3) Turn on system restore

TURN OFF SYSTEM RESTORE

  Click on start menu, Right click on computer and go to properties, Select system protection from the left pane, select C drive and click on configure. then select tun off system protection and click on okay.
Restart your computer for the settings to take effect.


DELETE THE QUARANTINE FILES AND TEMP FILES

   1) Delete all of the .tmp files in c:\windows\temp.
   2) Delete all of the files in the SEP Quarantine folder.
   3) Delete all of the file sin the SEP Xfer folder.
 Then restart your computer.


TURN ON SYSTEM RESTORE

   Click on start menu, Right click on computer and go to properties, Select system protection from the left pane, select C drive and click on configure. then select tun on system protection and click on okay.

Restart your computer for the settings to take effect.


A recent update, This issue is fixed in Symantec endpoint protection 11 MR6 MP3 version. 

Hope this helps. have any queries leave it in the comment section..
                                                                                                                                     Techytips

Wednesday, August 31, 2011

How to recover when Wscommcntr1.exe/Wscommcntr2.exe eats up CPU resource and system hangs with Autodesk products installed


 Hey folks, In my previous post we discussed about the error message with Revit and navis in one of my friends computer. The same guy is using Autocad 2012 in his computer and experience drastic performance variation some times.

 He was reporting that even though he has 8Gb of RAM installed in his computer, It is freakingly hangs when he is working with Autocad 2012.

 Let see how to stop that nonsense...


 The first thing I did was, I checked in task manager for any unusual activity and found that Wscommcntr1.exe is eating up almost half of the CPU resources. Then I searched for the information about the (Wscommcntr1.exe) process in internet. then i found that the process Wscommcntr1.exe is a part Autodesk Communication Center module. Then i decided to turn off that feature.


The below procedure will help u to turn that feature off.


Open regedit by typing regedit.exe in run and hitting enter. In the regedit windows navigate to HKEY_LOCAL_MACHINE\SOFTWARE\Autodesk\AutoCAD\R18.2\ACAD-A030:409\CadManagerControl\CommunicationCenter. In the right pane,

i)   Double click on EnableCommunicationCenter , put 00 in value data and click ok.
ii)  Double click on EnableNonPatchNotifications , put 00 in value data and click ok.
iii) Double click on MaintenancePatchNotificationOption , put 00 in value data and click ok.

 Once you edit the following values restart your computer and try working with Autocad.

If you have any queries please leave it in the comment section. Hope this helps...

                                                                                                                                         Techytips

How to recover Revit cannot run the external command "Navisworks 2010/2011/2012" error in revit Structure/Architecture


  A friend of mine called up and asked me to correct an issue he is facing with Autodesk revit structure 2010 suite, while he is trying to use Navis manage 2010 exporter plugin.

 whenever he tries to load the Navis exporter 2010 as an add-in, he gets this error message.

 He was on a 64 bit windows box, with both revit structure 2010 and Navis manage 2010 installed...


After a small research i realized as u can see in the error screen attached, Revit structure 2010 64 bit, tries to load Nwexportrevit2010_7.dll from c:\program files(x86)\common files\Autodesk shared\navisworks\2010\Nwexportrevit2010 . Which means revit 2010 64 bit tries to load navis 2010 32 bit dll file in a windows 7 64 bit box. That's where it's stuck.


  I checked in control panel and found both navis exporter 32 bit and 64 bit plugin were installed in his computer. And revit took 32 bit plugin as default and tries to load it.

  Then i just removed navis exporter plugin 32 bit from his computer through programs and features wizard and restarted his computer.

  Voila!! after that restart revit can load the navis exporter plugin without any problem.

  Thought i would share this information with u guys. If you have any queries leave it in the comment section.

  Hope this helps.

                                                                                                                                     Techytips

Tuesday, August 23, 2011

How to Dismantle or DissamblyDELL LATITUDE E-SERIES (E6510, E6400, E6500, E5500, E6000,E4300, E4200, E6220, E6320, E6520, E5420)


In this post we will discuss the procedure to dismantle DELL E-Series maptops (E6510, E6400, E6500, E5500, E6000,E4300, E4200, E6220, E6320, E6520, E5420).

We will describe it with a dell e 6510 laptop but the same procedure will suite for all dell e-series laptop. U will get access to ram and hdd.


Remove the five screws and battery as mentioned in the below image...


After removing the screws, pull that cover as mention in the below image.


Hdd can be removed by pulling it in the mentioned direction.


Hope this helps..
                                                                                                                                       Techytips

Sunday, August 14, 2011

How to rectify "unable to communicate with the reporting component" in sepm server


Hey friens, Recnetly was installing Altiris IT management sollutions through symantec installation manager to test it's ability in my organization's environment, But as a part of pre request check it asked me to configure script mappings for IIS. I did as it said and it passed the pre request check. Successfully installed altiris IT management sollutions. Thank god. I did it..


But when i open my symantec endpoint protection  management console, i was shocked as it display "Unable to communicate to reporting commponent" error when i login to my console and there were a white blank screen on HOME, MONITOR and REPORTS tab. Oh my god, i forgot i had sepm console in the same server, and now i made a mess in IIS...

Found many procedures to troubleshoot this issue, None of them worked for me.

Tried resetting IIS, Tried reconfiguring ODBC, tried restoring apppoolsettings in IIS blah, blah..... None of them set that right.

So i decided to go ahead with repairing sepm installation as i cannot let that error persists for one or two days and open a support case in symantec. Because i had configured almost 12 scheduled reports that run daily.

As i was ready to repair sepm installation i took database backup and keystore backup, as i might need it later to restore if anything goes wrong.

Started repair, after 5-10 mins it asked me to reconfigure sepm, I specified same configurations as i had set my server earlier. Volia my console came online again. The scheduled reports are also working now.. Thanks to repair. :)

Hope this post helps you..


                                                                                                                                            Techytips

Friday, August 5, 2011

Allow standard user to change system date and time : How to change system date and time without admin privilege.


  Hey friends, In this post we will discuss about setting up permissions for a standard user to change system data and time in windows.
  Let see how we can do that..


   Login to your computer as ad administrator. Type secpol.msc in run and hit enter to open local security policy. Click on continue if UAC prompts...


  Expand local Policies>User right assignment, in the right pane double click on Change the system time to edit it.


  By default, Administrators and Local service will be having the permissions. To ad a standard user or a group, Click on add user or Group(marked as 1).  Then click on object type at the top right. Put a check mark on Groups if you want to add a group(marked as 2).

  Type Users and click on check names(marked a s 3). Once the group name is resolved, click on Ok in all opened windows to accept the change. You can even add a single user name if you don't want to add user group.

  That's it now login as a standard user, and you will be able to change the system data and time..

  You can even manage this security policy through GPO if you are inside a domain network. Need to edit your GPO as below.


Hope this will help you...

                                                                                                                                          Techytips

Tuesday, July 26, 2011

How to install vista and windows 7 OS using pen drives(Removable hdd)

 
  In my previous post we discussed about installing Windows XP using thumb drives. The post can be found here, http://delphintipz.blogspot.com/2011/07/how-to-install-xp-os-using-pendrive-or.html .

  In this post we will talk about installing Windows 7 and windows vista using thumb drives.


  To make your pen drive bootable you need to download and install the latest version of Ultra ISO , and you must have windows 7 or windows vista dvd image in .iso format. If you have a dvd with vista or Windows 7 you can make .iso image using ultra ISO...

  Open Ultra ISO application by clicking the shortcut(If you are using vista or windows 7 right click the shortcut and select run as administrator). Open your windows 7 or vista .iso dvd image through file menu of Ultra ISO.
  Once you opened the .iso image select Bootable>WriteDiskImage


  Select the USB drive you want to make it as bootable. Click format, and format the drive using ntfs partition. Then click on write to begin the process.

  Once the process is completed, you can remove the drive from your computer and start installing with that pen drive.

  Hope this helps...


                                                                                                                                    Techytips

Thursday, July 21, 2011

How to install XP OS using pendrive or removable HDD(No command prompt stuff)


  Always wanted to install OS using thumb drives. Just thought of sharing the procedure to install XP os using a pen drive.

  This post will help you to do that.

  The first step is to download a free application called WinSetupFromUSB_0-2-3 from any one of below link...

Server1
server2

Then install the application in your computer. Open the application (If you are using vista or windows 7 right click the shortcut and select run as administrator). This application can be used for 2003 server as well.


Read the warning message, You must not use FAT16 file system on thumb drives greater that 2 gb. Also if you format the drive using ntfs the installation time will be less.


   If you have xp CD, copy the content of that CD to a separate folder, and select that folder as your windows xp source.

   Select the usb drive you want to make it bootable if you plugged more than one usb drive.

   Don't touch the remaining things. Click go. Wait for it to complete.

  That's it. You are ready to go. Use the pen drive to install os.

    Hope this helps..

                                                                                                                                         Techytips

Tuesday, April 26, 2011

"This operation has been cancelled due to restrictions in effect on this computer" when you click an hyperlink in outlook message


     your outlook throw the above error when you click an hyperlink in your outlook message, there is nothing to do with the group policy eventhough the error looks like gp mismatch..
     This error comes when your system get confused about the default browser of your windows. There are two locations you need to look at...

Set IE as your default program
    
     To set IE as your default program, go to Control panel > default programs > set your default program. Then click on internet explorer and click on set this program as default.


Restoring REGISTRY settings to default

   After setting up IE as your default browser your need to restore the file association of .html, .htm, .shtml, etc.. This can be done in registry, Let's see how to do that.

   Type regedit in run and hit enter. This will launch registry editor. Expand HKey_Local_machine > Software > Classes find and select .html, in the right pane double click on default and change the value to htmlfile, then give ok. The default value might have been changed if you were having any browser other IE previously.

   Do the same for .htm, .shtml, .shtm to restore their association to default.


Feel free to contact us, if you find any difficulties. Hope this helps..

                                                                                                                                Techytips

Tuesday, April 12, 2011

How to recover "cannot create the window" error in Visual studio 2010 (Vs2010)


    I got this error recently, while configuring visual studio 2010 for one of my client. But he has visual studio 2008, and it's working flawlessly. While opening vs2010 alone the error "cannot create the window" appears, and vs2010 doesn't open.

    As it did not happen earlier and vs 2008 is working well, i though the problem must be either with the installation or with the third party add in installed. So I started reinstalling it.

    Even after re installation of vs2010, the same error pops and vs2010 doesn't open. Then i started digging the information about the add ins installed. After two hrs of hopeless browsing and r&d, I was tired and wanted to take some rest...

   After some time something strike my mind, and i started to feel that, the problem is lying with .net framework 4 and related updates. First i tried to uninstall .net framework 4 extended and it failed as we need to uninstall .net framework 4 client profile first. I could not uninstall the .net framework 4 extended even after removal of .net framework 4 client profile.

    I downloaded the .net framework cleanup tool and with the help of this tool i succeeded uninstalling .net framework 4 components.

   After a couple of restart the .net framework 4 components installed through windows update. Finally voila, VS 2010 started to work like a charm.

  The corrupted .net 4 components did not affect VS 2008 as it uses 3.5 components.

                                                                                                                                    Techytips

Monday, January 10, 2011

HOW TO RUN DANGEROUS DAVE AND OLD DOS GAME IN LATER VERSION OF WINDOWS(AFTER XP) "EX SHOWN HERE WIN 7 64 BIT"

STEP 1: DOWNLOAD DOS BOX (VER 0.74) http://www.dosbox.com/download.php?main=1 AND INSTALL. CLICK HERE TO DOWNLOAD FROM RAPIDSHARE


STEP 2 : DOWNLOAD DANGEROUS DAVE http://www.acid-play.com/download/dangerous-dave AND EXTRACT TO A FOLDER C:\DOS...

                CLICK HERE TO DOWNLOAD FROM RAPIDSHARE


STEP 3: RUN THE DOS BOX AND TYPE THE BELOW
                mount c c:\dos
                c:
                c:\>cd dave
    dave.exe
    PRESS ALT+ENTER FOR FULLSC REEN


Hope this helps..

                                                                                                                      Techytips

Twitter Delicious Facebook Digg Stumbleupon Favorites More

 
Design by Free WordPress Themes | Bloggerized by Lasantha - Premium Blogger Themes | Bluehost Coupons